How To Save the Molding on a Lath and Plaster Remodel

by Troy Scott
(Eureka, KS)
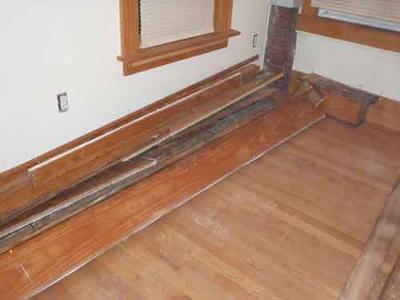
Refinishing Wood Moldings

Refinishing Wood Moldings

I am buying a 1920's carpenter style house, it has beautiful wood trim but the lath and plaster is in bad shape and needs to be removed for wiring, plumbing, and insulation updates.

If I remove the molding, the 3/4" plaster and 1/4" lath, and install 1/2" sheetrock,
my moldings will be to short if I don't destroy them during the removal.

I could shim the walls out then sheetrock it, but in my experience the plaster isn't a consistent thickness.

I guess I could shim out plenty, cut my trim to fit, but I'm back to... If I don't destroy the moldings during removal.

I also thought of cutting the plaster 6 or 8 inches off the trim, removing the plaster, then shimming the studs to run flush to the remaining plaster, and mudding the joints.

What do you think?

Comments for How To Save the Molding on a Lath and Plaster Remodel

Average Rating starstarstarstarstar

Click here to add your own comments

Rating
starstarstarstarstar
Baseboard Moldings In Closet
by: Anonymous

Hi Joe,

What a great article.

The idea of leaving the moldings in place was great.
I disagree on the moldings in the closet.

It's my experience that when removing that amount of moldings you will have broken pieces and waist;
those are the ones I would use in the closet.

Reply by Joe

Thanks Troy,

Hope I added a little fun and excitement to your project with our conversation.
I enjoyed writing about recycling baseboards and it's a "Green" way to go as well.

I see what your saying about using the new baseboards in the closet.

I did have a fixer-upper with so many broken, bowed, and mismatched wood types; #1 wood-grade mixed with #2-grade boards with knots,
that one room got all new baseboards, it turned out nice.

I sure would like to see your photos if you would like to share them.
At the bottom, use the 2nd link to add comments with your photos.

Thanks for sharing Troy, I enjoyed it,

Joe

Rating
starstarstarstarstar
Removing Old Style Moldings
by: Joe Trometer

Hi Troy,

That's a great question...

There is no doubt, the wood moldings and casings are going to be brittle after 90 years.

About Removing the Old Moldings

The trick to careful removal of the old moldings are to delicately start at one end with a pry bar, lever or pry the board about 1/4", then move down the board in 12" increments to the end, then start over.

Pulling the boards from one end only, is often likely to break.

Some boards may already be split.
In that case, I've used wood glue and clamps for that repair.

I have seen plaster and lath wall replacements without removing the old moldings.
The plaster was cut above the molding with a reciprocating saw and circular saw with settings not to cut into the studs.

After the new sheetrock was installed, a decorative style of molding was used to cover the exposed plaster and lath behind the molding and the new sheetrock.

Access for new plumbing, electrical, and insulation are not a problem because the maximum heights of the old wood moldings were 7-1/2 inches.

Minor problem with that is
the broken plaster during demolition will accumulate behind the moldings in between the studs.
Extra clean out work, but lots of money saved from buying replacement wood moldings.

Shimming the Studs

Like you mentioned, 3/4" plaster and 1/4" lath,
each stud would have to be shimmed 1-inch.

You'd have to rip 2 X 4 studs one inch to shim each existing wall stud.
My concern with that is, that creates more room for error when the sheetrock is installed and you may end up with a wavy wall.

Here's What I do

Those old style wood moldings from the 1920's are usually Douglas Fur-(pine) or Oak and can be purchased at the lumber yards and home remodeling centers.

After I install the new sheetrock, I strip the old molding of its paint or shellac finishes.
I've used paint stripper, belt sanders, but the easiest way for me was to run them through an inexpensive wood-planer.

My choice of finish is linseed oil for a natural look unless I'm painting.

I use the original moldings in the visible areas.

I add new boards in the less visible areas like the closets.

That last project I did only required 2 new 8-foot replacement boards to match the old molding...

...That for me is much easier, faster, and less expensive than shimming, patching, and cleaning the cavities behind the moldings.
And it looks like a new house versus a re-worked project house.

Hope that helps you...

If you'd like to add to this page, use "click here to add your own comments" below.

If you'd like to add more pictures or start your own page, use the link below that.


Click here to add your own comments

Join in and write your own page! It's easy to do. How? Simply click here to return to Rehabber Answers to Questions Questions.


Share this page:
Enjoy this Page? Heres a way to pay it forward and link to it...

Would you prefer to share this page with others by linking to it?

  1. Click on the HTML link code below.
  2. Copy and paste it, adding a note of your own, into your blog, a Web page, forums, a blog comment, your Facebook account, or anywhere that someone would find this page valuable.